Building Your Own Wicking
Bed Planter
By Courtney Donovan Smith
Translated by Angela Cheng
After building my own considerable home garden I discovered that watering all the plants, especially in summer, had become a significant chore, taking over 90 minutes per day--and it made it impossible to leave town. However, one day on Youtube, I stumbled upon wicking bed planters, also known as self-watering planters, that allow you fill a reservoir at the bottom of the planter, then leave it for a week or several, with the water being drawn up by the wick, the potting soil and the plant roots. Since then, I have made over 100 of these containers. Below I will share with you the one I think best for most apartment or small house dwellers.
|
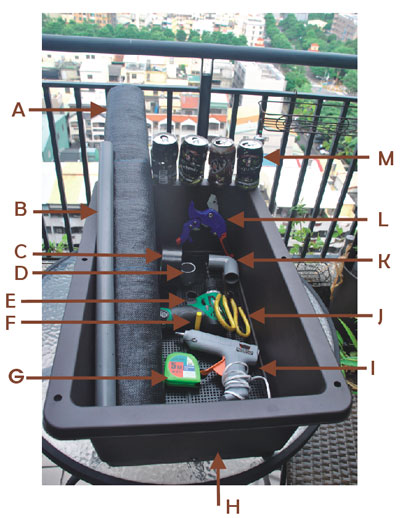 |
Required items:
A.
weed mat (roughly 1 x 1.1 square meters)
B. 1" PVC pipe, 35 cm long
C. wide tape
D. 1-inch PVC pipe cap
E. drill
F. chalk
G. tape measure
H.
1 planting container (this kind is widely available)
I. glue, preferably glue gun
J. tough scissors or shears
K.1-inch PVC pipe bend
L.
1-inch PVC pipe cutter (or ask hardware store to cut for you)
M.8 empty soda cans
|
|
|
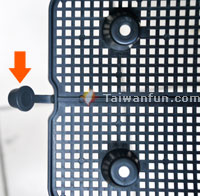
Cut off the plug piece off the plastic mesh and glue this into the drainage hole on the side of the planter. Let dry and test that it doesn't leak. |
|
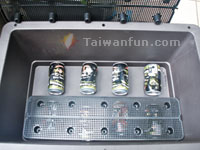
Poke plenty of big holes in the cans so water flows freely through it on all sides. Place the cans in the bottom of the container, lined to fit between the plastic mesh support pegs, and lay the plastic mesh over the top of the cans. (note: the mesh comes with the container) |
|
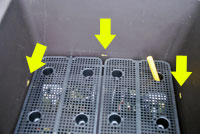
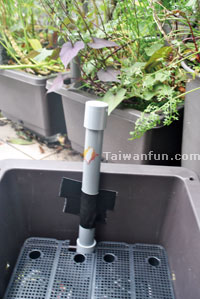
Use the chalk to mark spots about 2-3 mm above the plastic mesh on three sides of the container, at as close to the exact same height as possible. Take everything back out and drill one hole at each chalk mark. These are the overflow holes, when you fill your planter and water pours out of these holes you know it is full. |
|
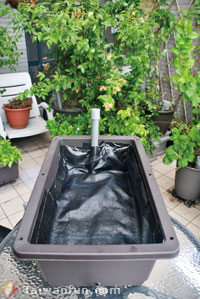
Put the 1" PVC pipe bend on one end of the PVC pipe, and the cap on the other. The cap is the top. Cut a hole in the plastic mesh large enough to accommodate the PVC pipe and the pipe bend. Place back in the cans and plastic mesh. Tape the pipe securely to the side of the container with the pipe bend flush with the bottom of the container. The cans and plastic mesh support the reservoir. |
|
Fold the weed mat in half, and tape it in securely to the sides and around the pipe making sure there are no holes. It should ride up at least halfway on the sides on the inside of the container. The taped weed map acts as a wick and keeps the soil out of the reservoir. |
|
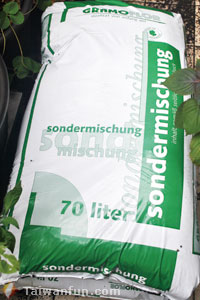
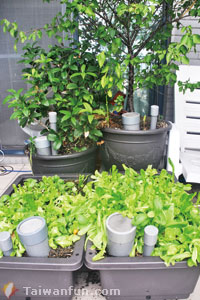
Add in potting soil made of peat and containing pearlite. DO NOT use regular soil. Pictured is one brand, but a more common brand is available at most large supermarkets. You can identify it by the little white 'rocks' mixed in, and by how light the bag is compared to normal dirt. Then add the soil to the container, watering layer by layer until the soil is, after patting it down so it is firm and wet, about 1 cm below the edge of the container. Put in plants or seeds. Fill the reservoir until water flows out of the overflow holes. If there aren't enough holes in the soda cans for the water to flow completely freely, you may need to give it a moment to settle, and top up some more. |
 |
Instructions for use:
As a general rule of thumb I top up the reservoirs once a week, but the actual time needed between top-ups can vary from one week to a month, depending on weather (the heat in summer dries it out faster), how thirsty the plants are and if it has been raining. With really thirsty plants or in hot, direct sun, you may want to water the top of the soil when you do the reservoir top up.
|
| Warnings:
1. If the cap is on too tightly, be sure to hold the PVC pipe firmly, and not accidentally pull it out of the planter (that means you'll have to re-do it!). If this is a problem, the solutions are to either file down the cap so it fits looser, or to bolt the pipe to the container wall using clamps.
2. This container works very well for most plants, as it keeps fairly steady moisture throughout the container, however, some plants do not like this kind of environment. Two examples are tomatoes and pepper plants, both of which prefer more drainage. I am experimenting now with a 70-80% potting soil and 20-30% sand mixture that has so far (a couple of months) seems to be working well--but the experiment is still in early days.
|
| Tips:
1. Cut the top off a PET soda bottle of nearly any size to use as a funnel. It fits perfectly in the 1" PVC pipe.
2. If you have a lot of containers like I do and bending down repeatedly is tiresome, try getting another stretch of PVC pipe and a 1" PVC pipe joiner--it allows you to extend the pipe up to the desired height.
3. Adding a worm feeder for compost and worms is a great way to compost without having to do any work. Check out the online version of this article for instructions.
|
Sources of information and edible plants and seeds:
Taichung City Gardeners Facebook page
270, JunGong Rd, Sec 2, Beitun Dist. |

 August 2014
